Note: The ability to create cron jobs has been removed from HappyKit since this article was written. This decision was made to focus efforts on HappyKit Flags, which has received overwhelming adoption since its announcement.
If you are looking for Cron Jobs, I recommend checking out Slater.
It's really impressive how easy it is to create API Routes in Next.js. Creating a file in the pages/api/ folder and writing a request handler is enough. And starting today, adding Cron Jobs to your Next.js application became just as easy.
The best way to show what HappyKit Tasks are capable of seems to be a short walkthrough of how to use them, so we'll continue tutorial-style from here on.
What we'll build
In real applicatoins, cron jobs might be used to send weekly summary emails, or to run cleanup tasks. They're great for anything that needs to run on a recurring schedule. For this article, we'll assume you want to send yourself an email with a random dad joke every evening.
The technical approach we'll take is to create a Next.js API Route which generates a random joke and sends it to you in an email when called. We'll then use HappyKit Tasks to invoke this API Route every evening. We'll also add in a check to prevent others from executing our function.
Step 1: Create an API Route
We'll start by creating our first API Route which will be available at /api/random-joke. When called, this API route will generate a random joke and then send that joke to you via email. Later on, we'll configure HappyKit Tasks to run this function every evening.
Cracking jokes
As we don't want to come up with our own lame jokes, we'll use the one-liner-joke package from npm. Install it with yarn add one-liner-joke.
Next, create a file called pages/api/random-joke.js and fill it with this content:
import oneLinerJoke from "one-liner-joke";

export default async (req, res) => {
  const joke = oneLinerJoke.getRandomJoke();

  res.status(200).json(joke);
};
This request handler will now respond with a random joke when you visit http://localhost:3000/api/random-joke. That was quick, nice.
Start sending mails
Let's now start sending funny emails. We'll use the sendmail package as it allows us to send emails without dealing with SMTP servers or external services.
Add it with yarn add sendmail.
Then adapt the request handler to the joke in an email instead of returning it.
import oneLinerJoke from "one-liner-joke";
import createSendmail from "sendmail";
import util from "util";

const sendmail = util.promisify(createSendmail());

export default async (req, res) => {
  const joke = oneLinerJoke.getRandomJoke();

  try {
    await sendmail({
      // replace these with your own email address
      from: "[email protected]",
      to: "[email protected]",
      subject: "Your daily joke",
      html: joke.body,
    });

    res.status(200).json({ ok: true });
  } catch (error) {
    res.status(500).json({ ok: false });
  }
};
Now reload http://localhost:3000/api/random-joke to trigger the email. You can check the terminal to verify the email is sent as sendmail will emit logs while sending.
Check your spam folder in case you don't see the email in your inbox. The email likely ended up in spam. This is expected as we didn't attach any DKIM information. That's good enough for the sake of this tutorial. In a real application, you could add the DKIM configuration to sendmail to stop your emails being tagged as spam.
Deploying
Since HappyKit Tasks can't invoke functions on your machine, you'll need to deploy your application. You can use vercel.com for a free deployment.
Step 2: Set up a HappyKit Task
You'll need a free account on happykit.dev for this. If you don't have one already, click here to sign up for free.
After signing up, you'll be asked for an optional domain when you create the project. Make sure to fill this with your domain from the deployment. It can be something like your-project.vercel.app which you get after deploying with Vercel.
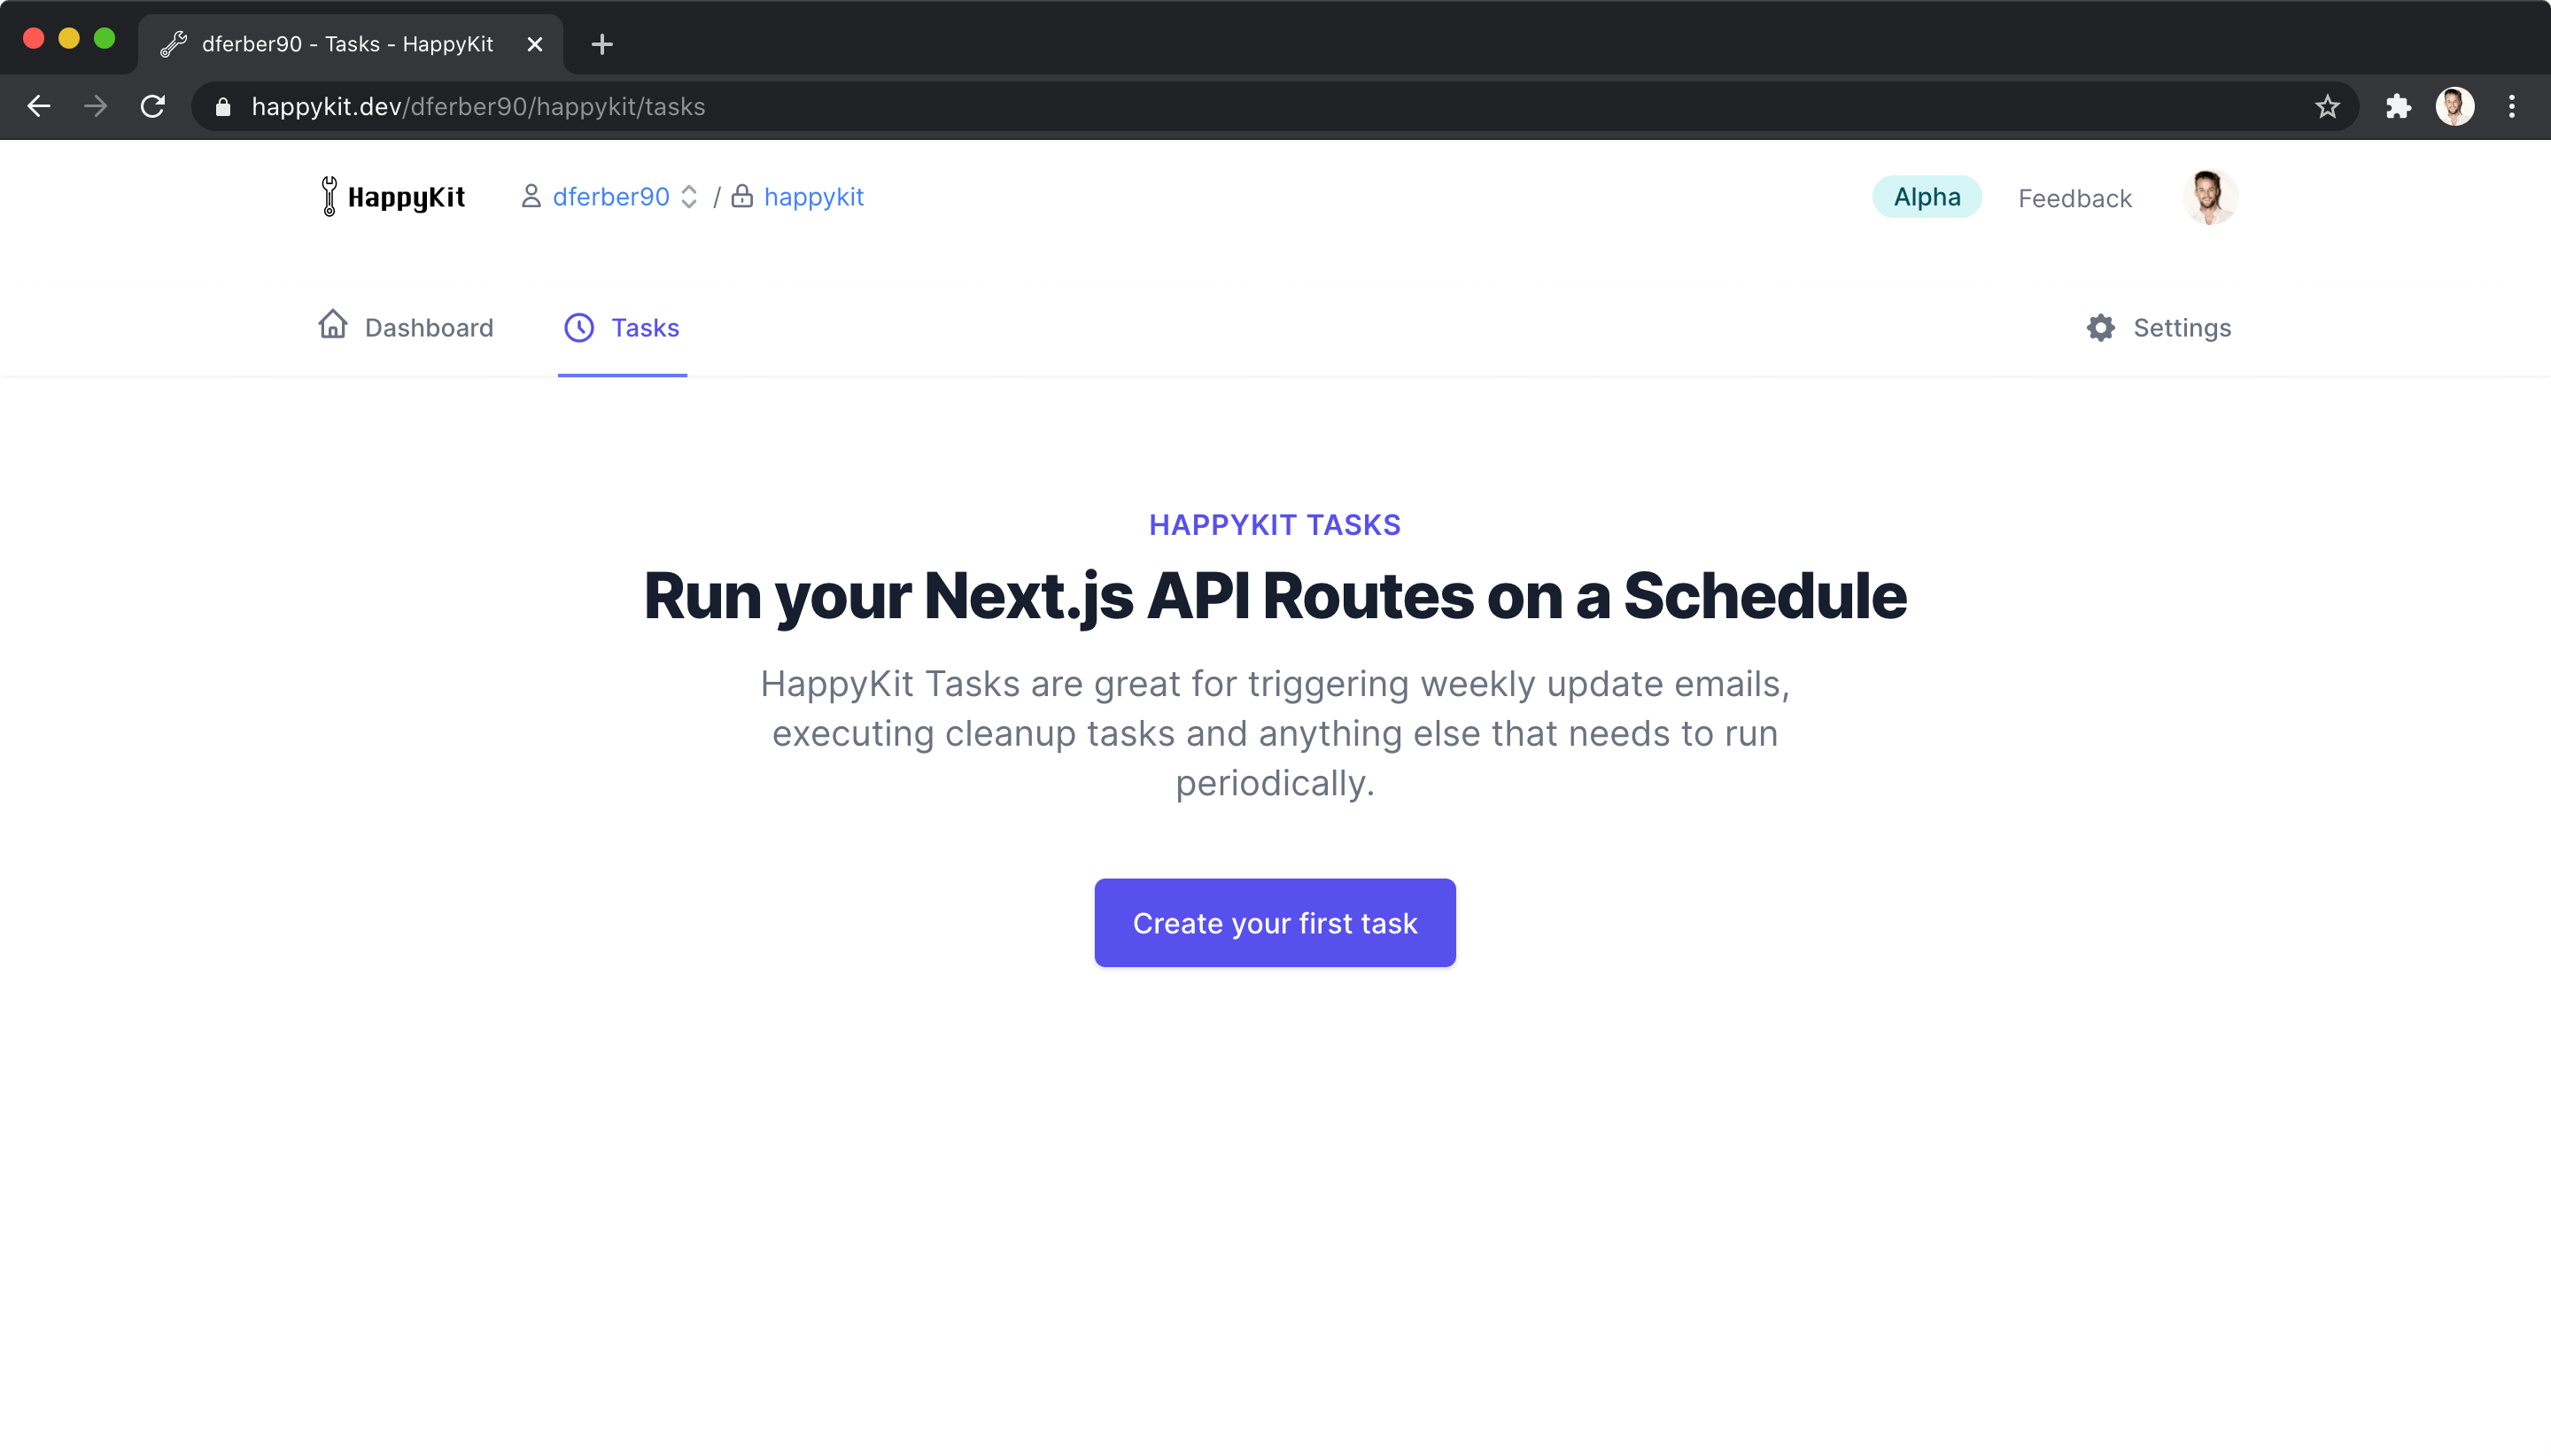
Creating a task
Skip the Analytics setup on the dashboard and click straight on "Tasks" instead. Click on "Create your first task" and fill the form with the following values:
- API Route:
/api/random-joke - JSON Payload: leave empty
- Switch the schedule from Fixed rate to Cron Expression
- Cron Expression:
0 18 * * ? *
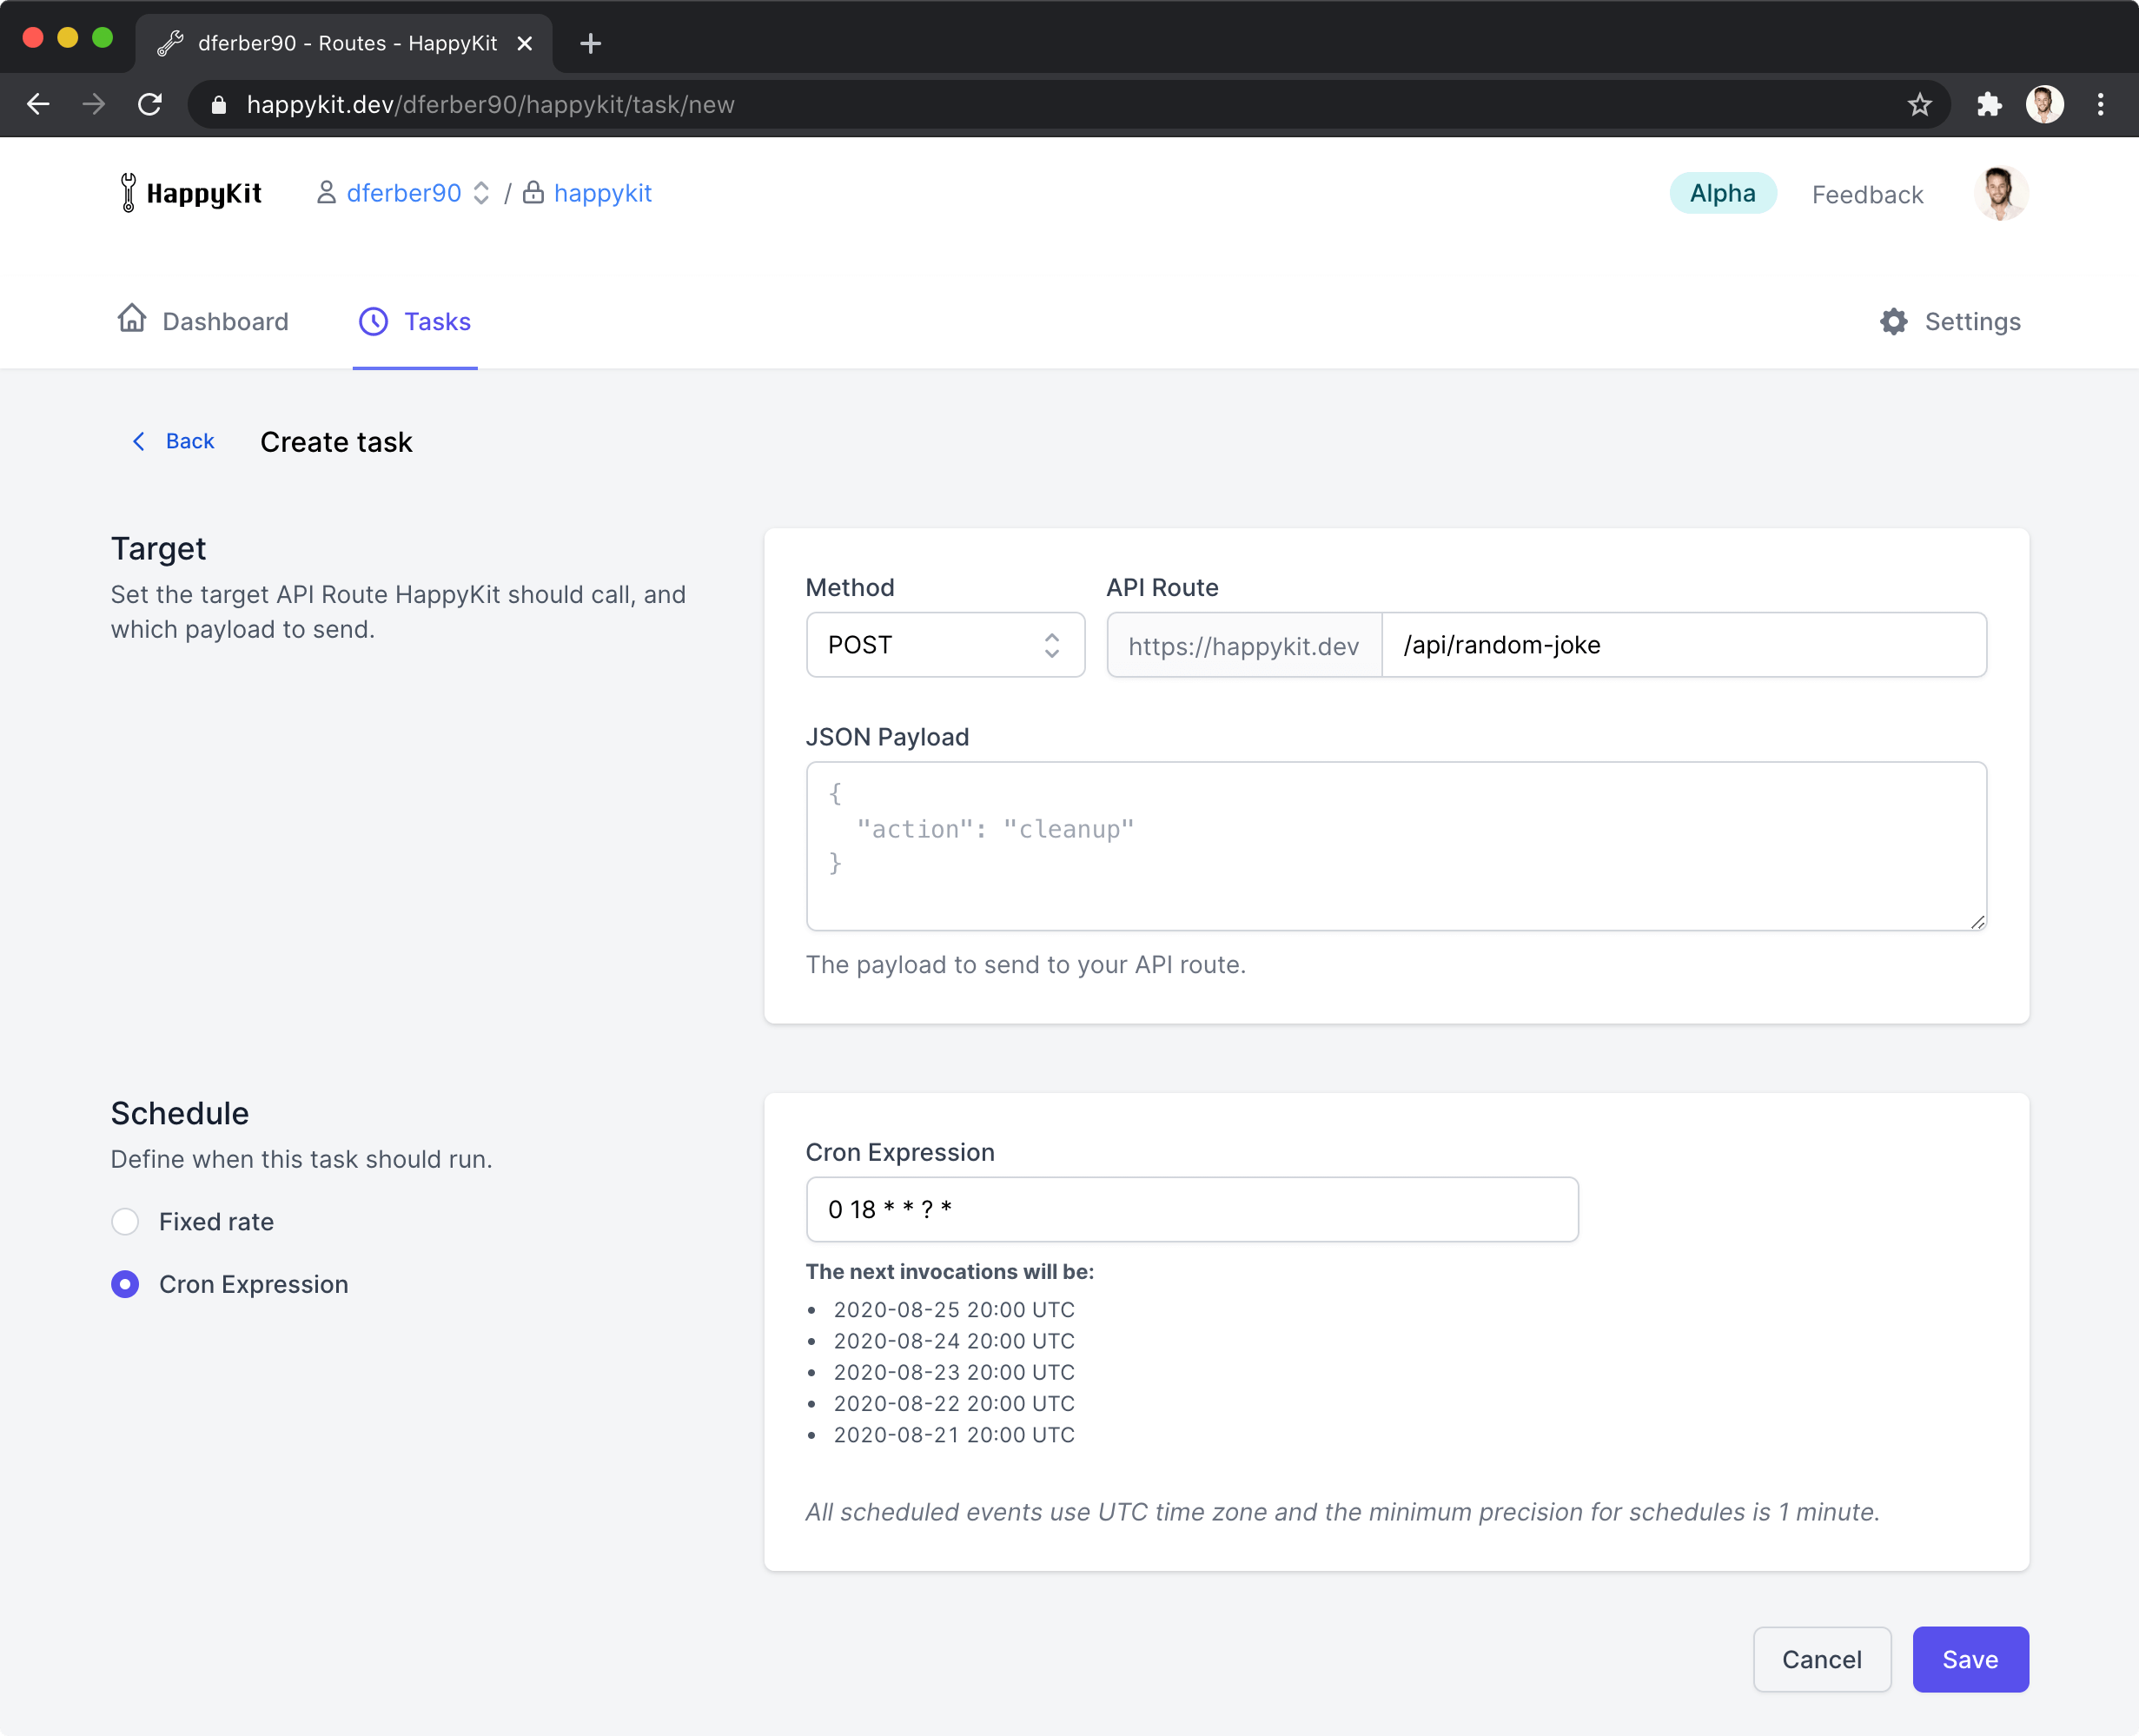
The Cron Expression we've used above was 0 18 * * ? *. This tells HappyKit Tasks to run this job at 18:00 every day of the week. HappyKit uses the AWS cron expression syntax. You can read more about the syntax here.
In case you don't care about the time your task runs, and you can use a Fixed rate. This will allow you to run tasks every x minutes/hours/days.
Submit the form and you'll be greeted with a success message like this:
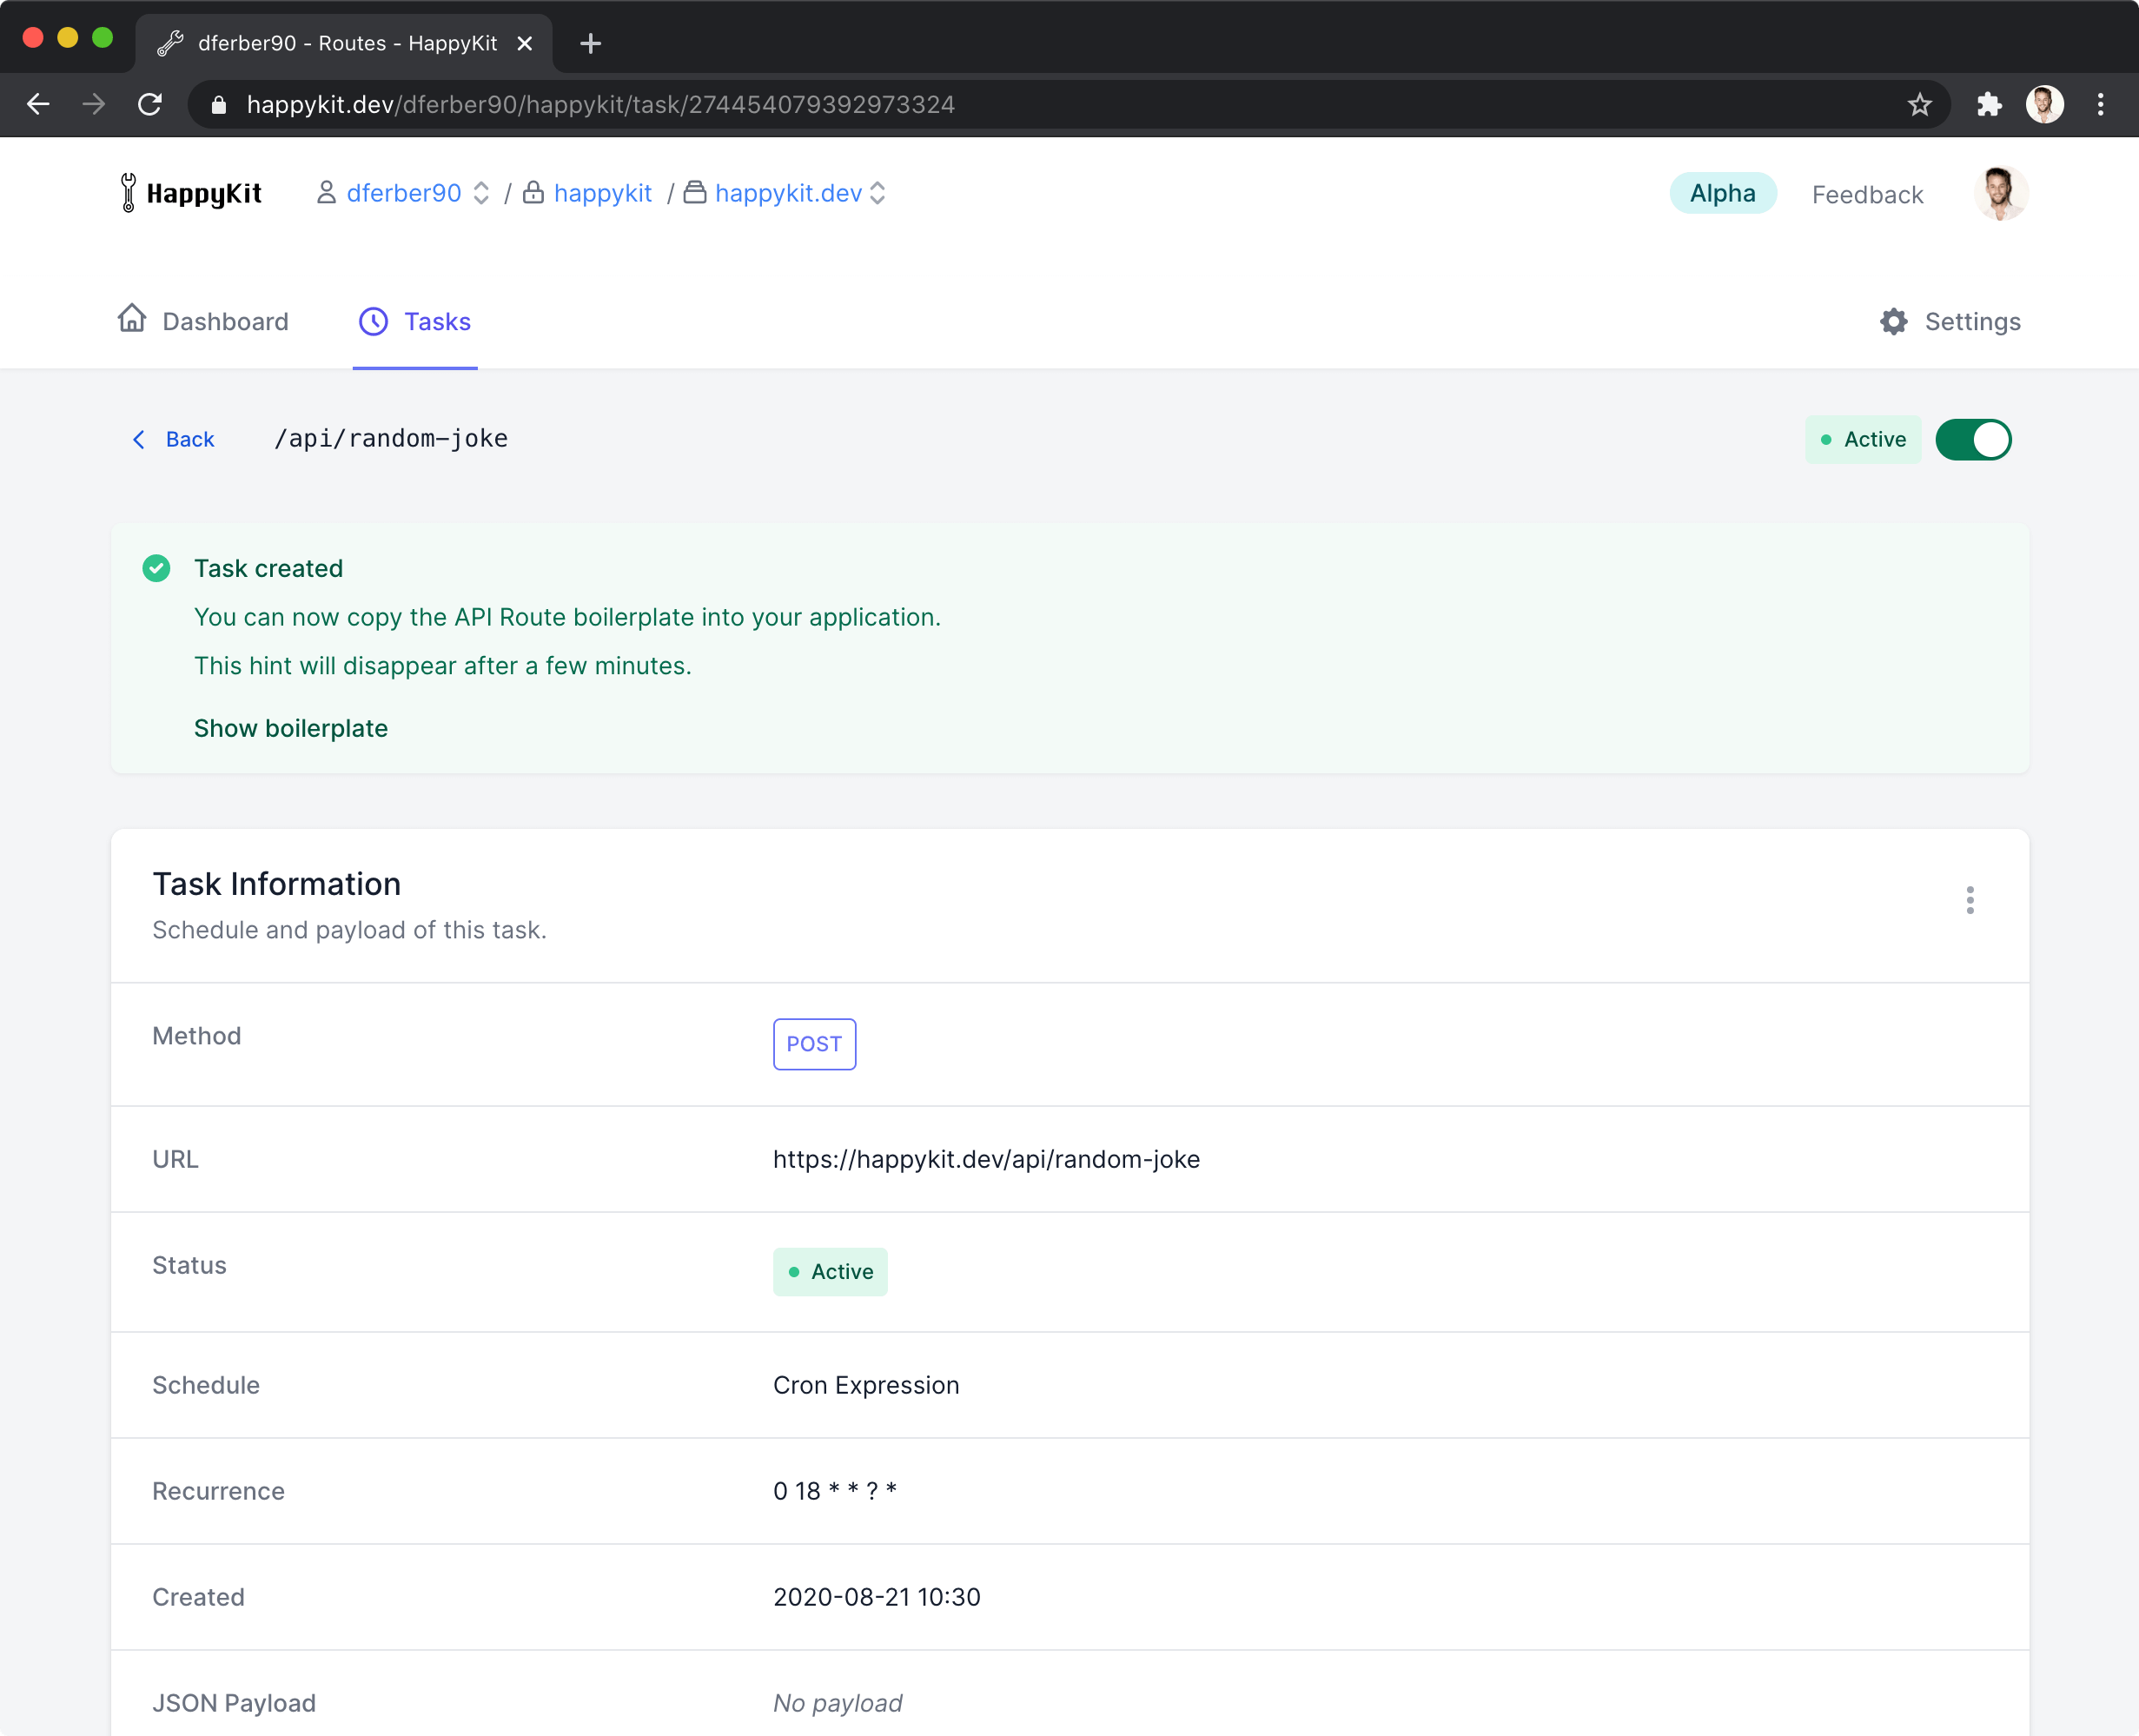
Currently anybody could visit /api/random-joke to trigger the email. This is bad as we don't want to let others trigger our tasks. HappyKit Tasks has a protective mechanism for this scenario built in. HappyKit will send an authorization header to your API Route, which you can verify in the request handler. Click on "Show boilerplate" in the green success message to bring up the default API Route request handler boilerplate, which also contains this check.
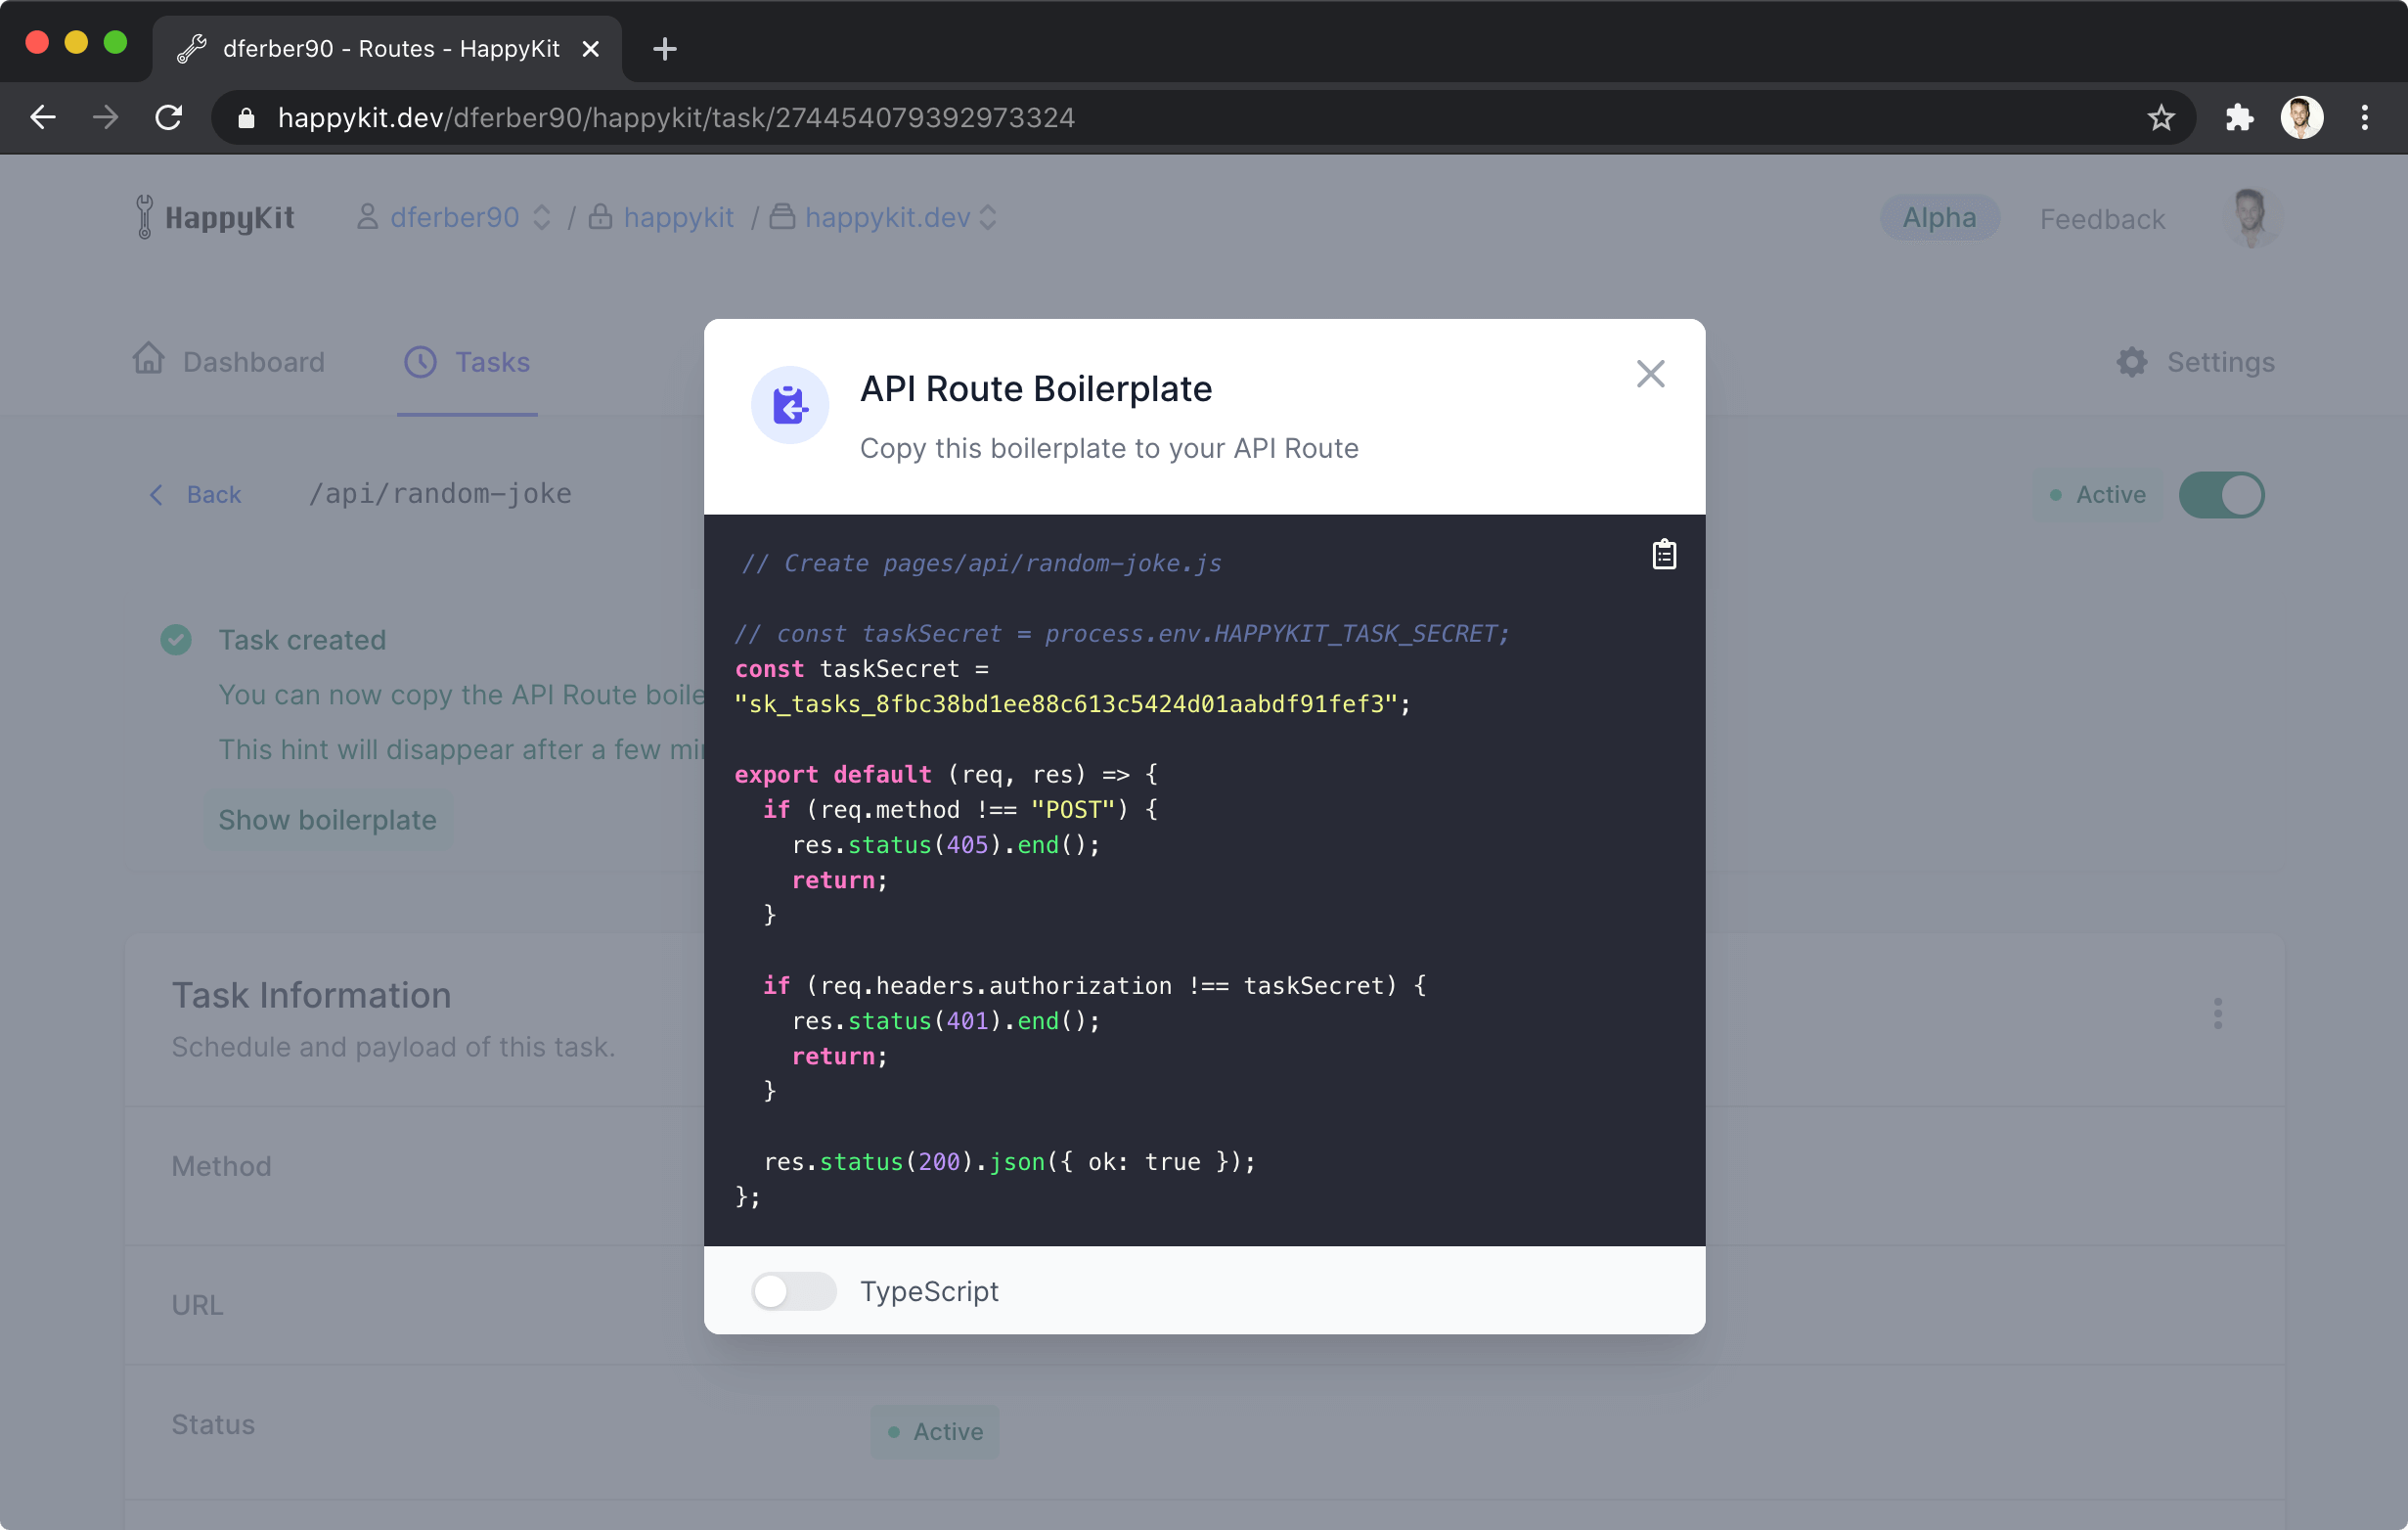
We'll take that boilerplate and merge it with our existing API Route request handler to create the final version like so:
import oneLinerJoke from "one-liner-joke";
import createSendmail from "sendmail";
import util from "util";

const sendmail = util.promisify(createSendmail());

// Replace this with your own secret
// You can find it in happykit.dev under Project > Settings > Keys
const taskSecret = "tasks_prv_8fbc38bd1ee88c613c5424d01aabdf91fef3";

export default async (req, res) => {
  if (req.method !== "POST") {
    res.status(405).end();
    return;
  }

  if (req.headers.authorization !== taskSecret) {
    res.status(401).end();
    return;
  }

  const joke = oneLinerJoke.getRandomJoke();

  try {
    await sendmail({
      // replace these with your own email address
      from: "[email protected]",
      to: "[email protected]",
      subject: "Your daily joke",
      html: joke.body,
    });

    res.status(200).json({ ok: true });
  } catch (error) {
    res.status(500).json({ ok: false });
  }
};
The API Route request handler will now accept POST requests that contain the shared secret in the authorization header only. We've now locked down our request handler so only authorized sources can trigger it.
Deploy this updated handler and you're done. You've now got Cron Jobs in Next.js!
Tips
- Group your tasks in a folder like
pages/api/tasks - Move the
taskSecretto an environment variable likeprocess.env.HAPPYKIT_TASKS_SECRETto avoid having it in your source code - You can show or regenerate the HappyKit Tasks secret in the Project Settings
- See previous executions of your API Route in the HappyKit Task details
Summary
We've created an API Route which executes any function we want to run on a recurring schedule. We then configured a HappyKit Task to invoke our API Route on that schedule. We also locked our API Route down, so we're the only ones who can invoke it.
HappyKit Tasks are free for your personal projects. Start here.
There will likely be a paid plan for teams later on. For now I'm focused on building the best possible tools to get sophisticated users and your immensely helpful feedback.
Follow my journey building HappyKit on Twitter: @dferber90.